


In this post, I thought I'd delve a bit more into what we actually get to see when visiting our suppliers. Some environmental shots of how it looks and a bit more about how various techniques, details, and products go from the idea stage to yarn and eventually become finished products.

In the pictures above, we see a couple of beautiful jacquards for spring and our lovely bestie sweater with a printed dot.
FINDING "KNITTING ERRORS"
At several of the units we visited, you can see someone pulling the sweaters over two illuminated "pillars" protruding straight up from a rotating plate. They start by threading the entire sweater over and spinning it. Then they thread the sleeves over the "pillars" and check all sides of the garment. This is part of the quality control process, ensuring that there are no errors in the product during the knitting process.

AT THE PRINTING WORKSHOP
We visited one of the units that works with our printed products. The process is somewhat similar to screen printing on woven or jersey fabrics. The difference is that for knits, we always print on the finished parts of the garment (instead of printing on a fabric that is then cut and sewn together). Here, each part is knitted separately and then linked together stitch by stitch in a linking machine. The long tables in the pictures below have a slightly sticky surface with lines drawn for how the various garment parts should be positioned. This eliminates the need for taping any edges. Instead, the part can be stretched out to fit within the markings. This way, the print lands more precisely in the right place. Personally, I find the table itself to be like a little piece of art with all the colorful lines against the black backdrop.

FROM INITIAL SKETCH TO FINISHED PRODUCT
At one of the suppliers, the little yellow lemon cardigan you see in the bottom right corner was currently in production. It's a product I sketched out for the upcoming summer collection. Here, it's laid out on the ironing board before being folded for delivery. It's always exciting to see how an initial rough sketch made several months earlier eventually becomes a finished product. Sometimes a lot has changed along the way. However, in other cases, you can already see approximately how the product will look on the first sketch – as in this case.

THE LOVELY DETAILS
In this picture, you see one of our felted wool cardigans. For those of you who own one, take a closer look at the collar. There, you'll notice a discreet crocheted edge – what a lovely little detail, with each garment being hand-crocheted.
It's also worth mentioning all the cardigans with small crocheted loops for buttoning. These, too, have been hand-crocheted. Luckily, the woman in the picture has significantly better crochet skills than I do – she's quite speedy!

SPACEDYED – HOW DOES IT WORK?!
Every now and then, we have garments in the collection where colors gently blend into each other, creating a soft variegated effect with subtle transitions. I've been uncertain about exactly how they achieve this coloring effect – and now I've finally seen how it's done!
This is highly valuable for me as a designer. Understanding the production process allows me to make decisions that lead to a great final product, especially since we often design our own special yarns, as in this long cardigan.
The digital sketch you see below is for one of the spring basic cardigans. It's a sketch we sent to the supplier to illustrate roughly how we wanted the colors of the yarn to appear on the cardigan.
- The yarn is steamed and warm, moist to better absorb the color evenly.
- This peculiar machine has large color baths connected on the side. The color baths are mixed as usual for the right shade. Then, the yarn skeins are laid flat and fed into the machine. Here, color is sprayed through the yarn at high pressure before it comes out the other end.
- This is how the skeins look when laid out to dry side by side – in striped blocks that, when knitted, create stripes.
- Here, a yarn skein hangs next to the machine as a color reference.

SAMPLES
Another aspect we spend a lot of time on during our visits is responding to samples on-site. This often significantly facilitates the process as we can discuss various options and solutions directly with the people who know the machines and techniques best. Sometimes it involves entire garments, other times the supplier has created their interpretation directly from one of Gudrun's watercolors, and sometimes it pertains to how the yarns behave together in the pattern, and then we receive a small swatch to examine.
In the pictures below, you see a couple of examples of how this process can unfold. In the left image, we've attached small notes in English with instructions on what needs to be corrected/changed. As soon as we attach a new note, someone from their team translates it into Chinese and places a little note next to ours. This way, they can hand over the garment with the instructions directly to the technician operating the machine. In the right image, our color swatches lie against the corresponding areas, and a small post-it note indicates which one should be replaced.

Feel free to join us for part three of the supplier trip – the inspiration.
/Amanda, designer at Gudrun Sjödén


 Behind the scenes
 Crafts and materials
 DIY Ideas
 Gudrunista
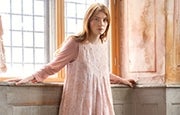 Inspiration
 Our story
 Sustainability
 Travel tips